How to use iPad File Explorer for Mac
iPad File Explorer is created to be as easy as possible to tranfer files between iOS device (including iPod Touch, iPhone, and iPad) and mac computer. To manage files on iOS like iPhone, what you need to do is just following these simple steps:
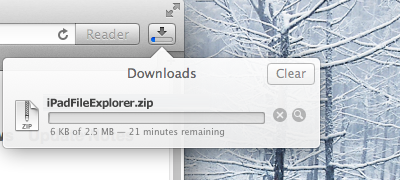
- First, you need to download the installer of iPad FIle Explorer.
- After downloading the installer, open Finder and find the .dmg installer file
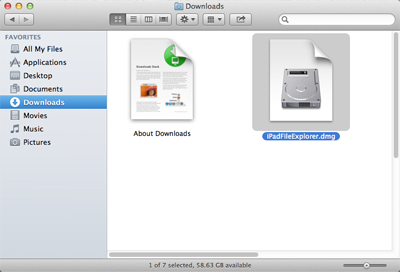
- Double click to mount the installer (iPadFileExplorer.dmg)
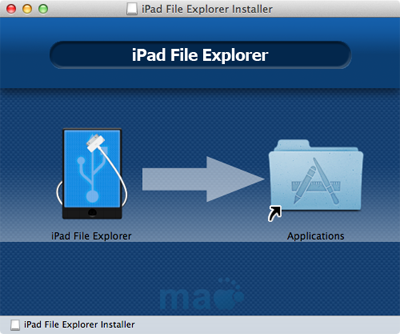
- Drag the icon "iPad File Explorer" on the left side over the right icon "Applications", and drop to finish installation.
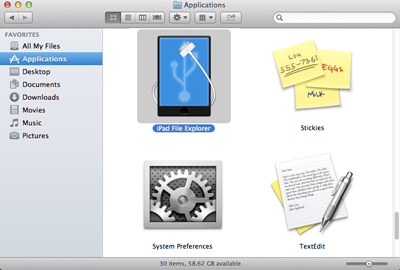
- Go to "Applications" and launch the app, you will be asked to activate the app with a legal registration code which you received after purchase.
- Once you have your iPhone connected to mac computer, the left side panel will show the iOS devices have been detected.
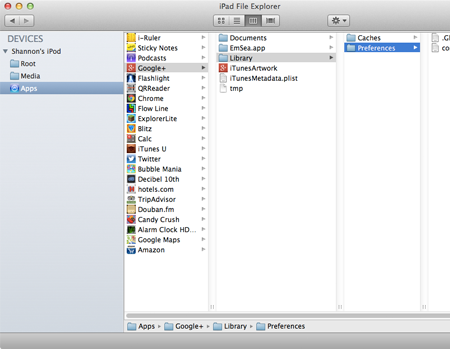
- Select different item in left side panel to display certain contents.
- To copy files between iOS device and mac computer, you have three choices as you like:
Right click on a selected folder or file icon to display the context menu.
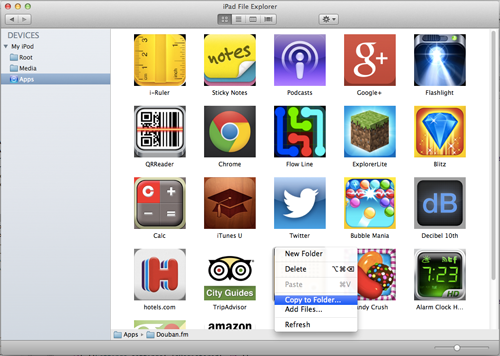
Select any folder or file and click the action button on the top bar

Drag selected folders and files, and drop in FInder to finish transferring
-
Action menu
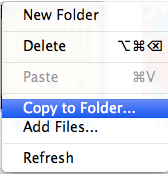
New Folder - create a new folder on iPhone
Delete - Delete selected folders and files (This operation can not be recovered)
Paste - Copy folders and files from system paste board to iOS device
Copy to Folder... - Transfer selected folders and files to mac computer
Add Files... - Copy files from mac computer to iOS device
Refresh - Force to refresh file system if it is necessary
Back to Support